Thursday, November 18, 2010
www.ustcrichmond.com
Hey folks! I wanted to give you a heads up on a new website that I have been helping out on. http://www.ustcrichmond.com. The US Taekwondo College is a great martial arts school on the South Side of Richmond Virginia in the Midlothian Area.
Wednesday, December 2, 2009
How to Create Stereo Headphone Plugs in Illustrator
How to Create Stereo Headphone Plugs in Illustrator: "

;)
"step05.jpg" width="600" border="0">


 "
"
In this tutorial, we'll explain how to create a headphone plugs with cables using gradients. The techniques covered in this tutorial can be used to create other types of wires and electrical equipment as well. Let’s get started!
Final Image Preview
Below is the final image we will be working towards. Want access to the full Vector Source files and downloadable copies of every tutorial, including this one? Join Vector Plus for just 9$ a month.
Tutorial Details
- Program: Adobe Illustrator CS4
- Difficulty: Beginner
- Estimated Completion Time: 1.5 hours
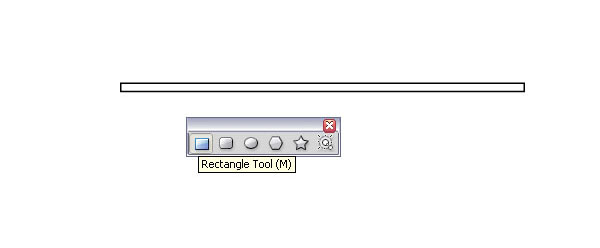
Step 1
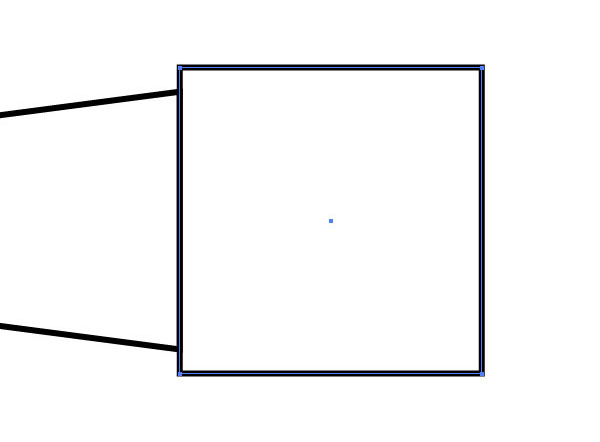
Open up a new document and select the Rectangle Tool (M). Create a rectangle. This will be used for the cable. We will keep it simple, for now set it to the default white fill and black stroke.
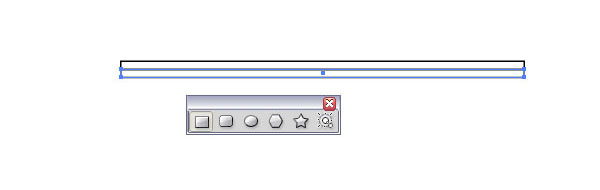
Step 2
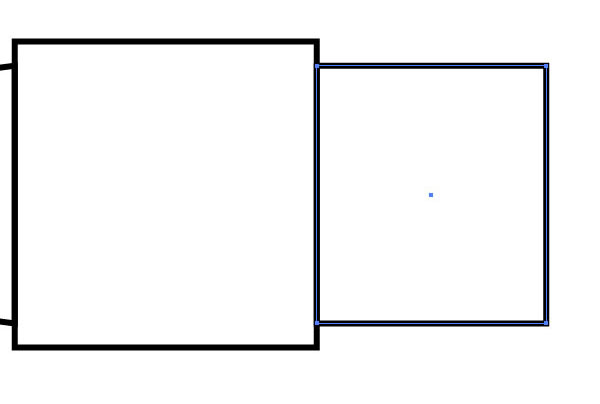
Duplicate the rectangle below the first (Alt-drag).
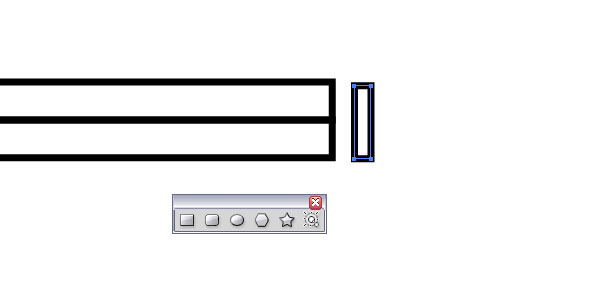
Step 3
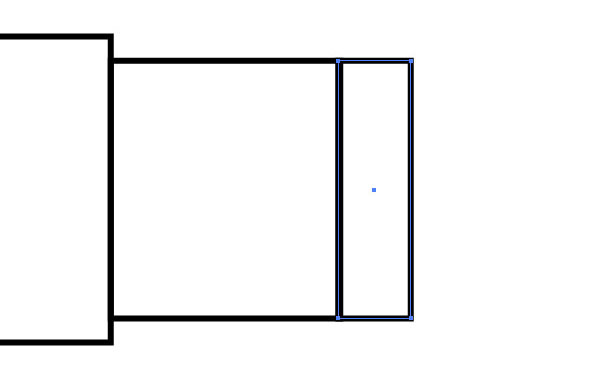
Create another rectangle and set the height to the same as the two long rectangles together, as shown below.
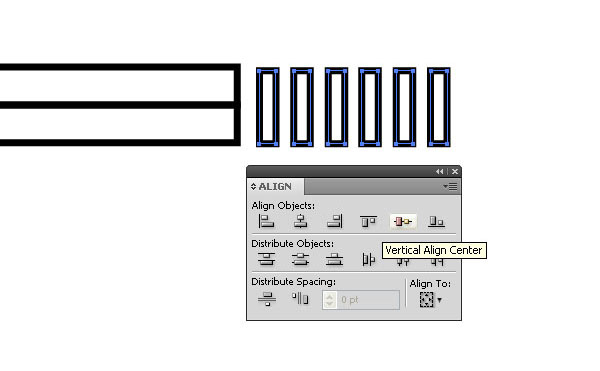
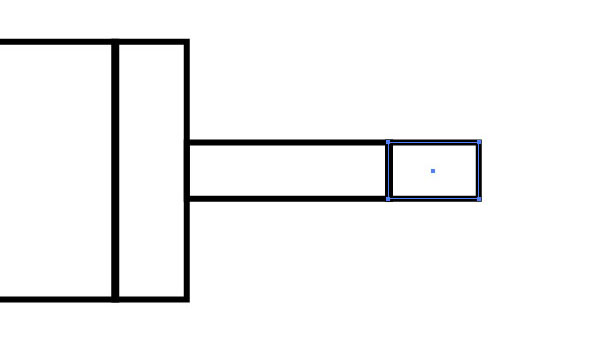
Step 4
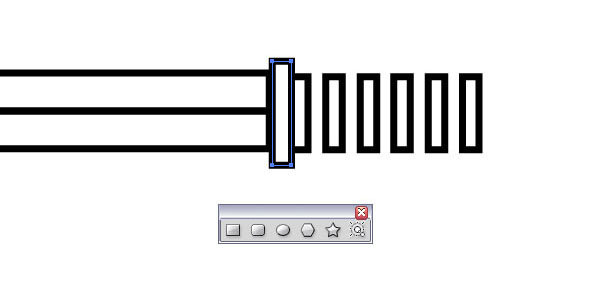
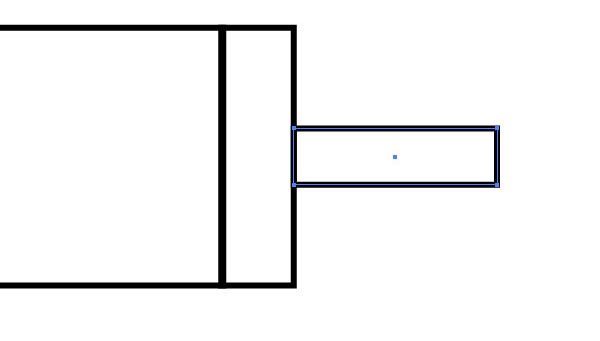
Duplicate the small rectangle five times. Either use Alt + drag and the Command + D or use the Blend Tool. Select all of them and align them along the vertical.
Step 5
With the shapes still selected, distribute them now horizontally .
"step05.jpg" width="600" border="0">
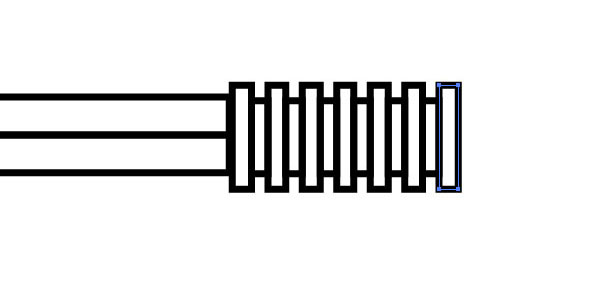
Step 6
Create another rectangle and repeat the Steps three to five times.
Step 7
We now have six smaller rectangles and seven slightly taller ones in between.
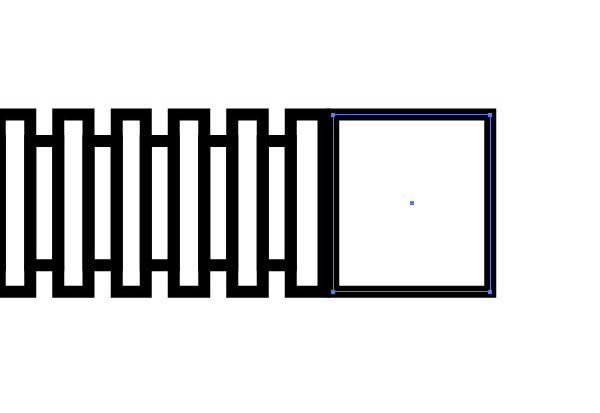
Step 8
Again, create another more square rectangle next to the smaller ones.
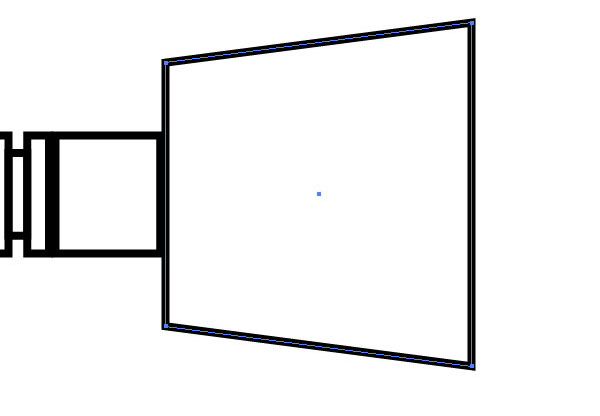
Step 9
Create yet another rectangle, but make it slightly bigger. Use the Direct Selection Tool (A) to select both right side points, then use the Scale Tool (E) to scale them up, while pressing Shift + Option.
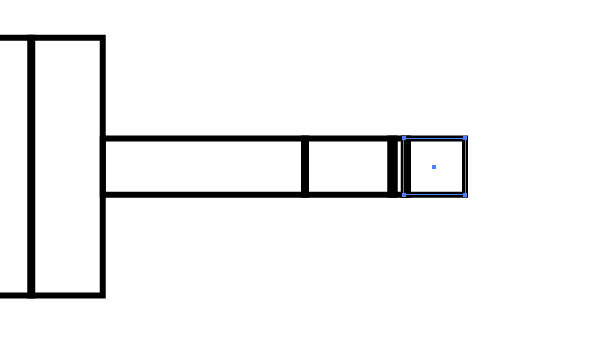
Step 10
Create one more square looking rectangle.
Step 11
Add another one and make sure you keep the sizes oriented with the previous ones.
Step 12
We are now moving on to the thin part of the plug. Create another rectangle, which is the same height as the last one, but much thinner. Quick Tip: You could just duplicate the rectangles and scale them to the correct sizes.
Step 13
Make another rather long rectangle and align it to the vertical center of the rest of the shapes.
Step 14
Rinse and repeat!
Step 15
We need two small thin rectangles that will simulate the two small black rings on a headphone plug.
Step 16
Rinse and repeat.
Step 17
Copy the small rectangle from Step 15.
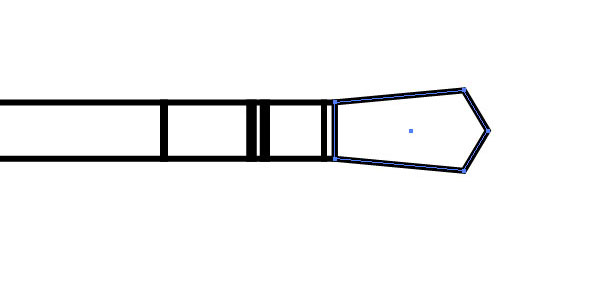
Step 18
Add another rectangle, but on the right side add one path point with the Pen Tool (P) in the middle of the path line and with the Direct Selection Tool (A). Repeat the scaling we did in Step 9. Now select the middle point and move it to the right. You can do this by hitting the right arrow key on your keyboard.
Step 19
This is the basic shape composition of the headphone plug.
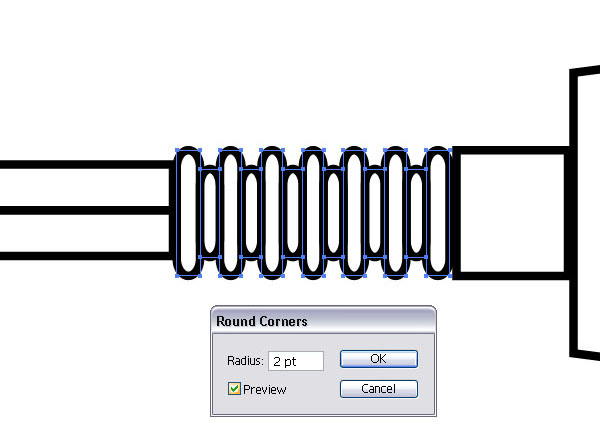
Step 20
Select the small shapes we created earlier in Step 3-7 and group them (Command + G). Now go to Effect > Stylize > Rounded Corners and apply a radius of 2pt.
Step 21
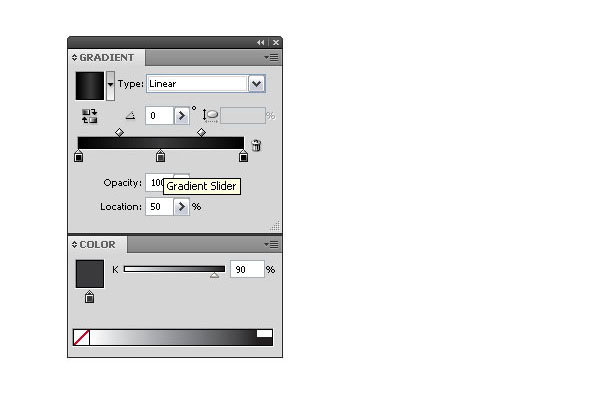
Let’s move on to the colors. Create a linear gradient that goes from 100% black to 90% black to 100% black. Now drag it into the Swatch Palette.
Step 22
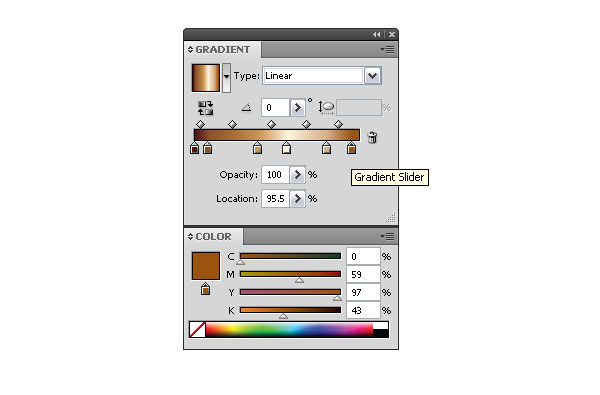
Setup another linear gradient with browns and beiges to simulate a golden color and drag it into the Swatch Palette.
Step 23
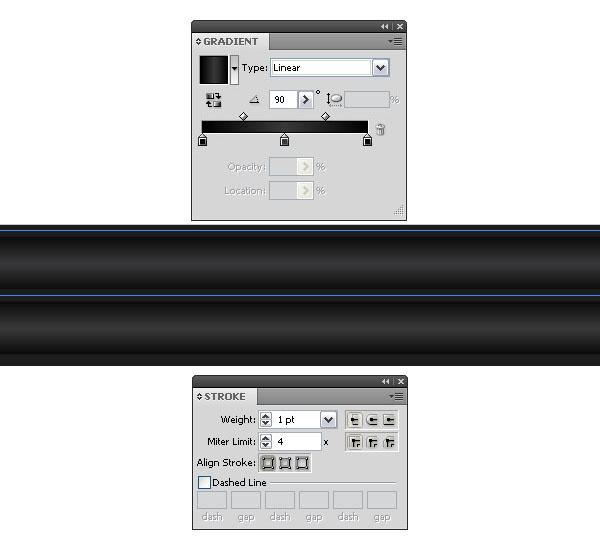
Now use the Selection Tool (V) to select the two rectangles that simulate the cable, then apply a dark gradient. Set the radius in the Gradient Palette to 90 degrees. Keep the Stroke.
Step 24
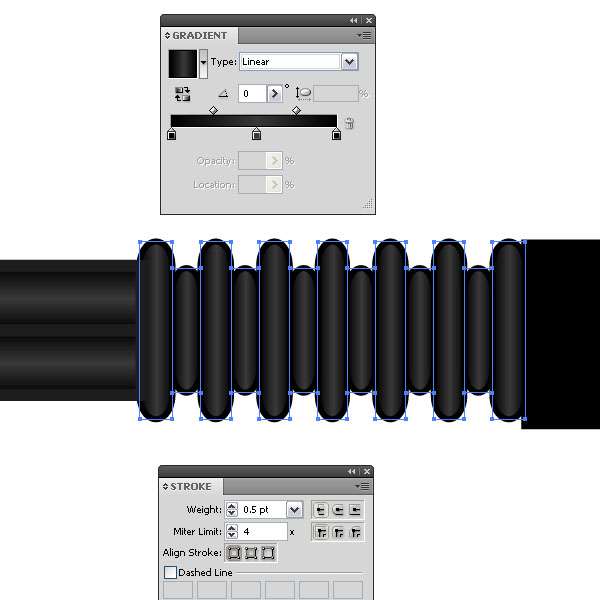
Apply the same gradient to the shapes with the rounded corners but set the radius to 0 degrees.
Step 25
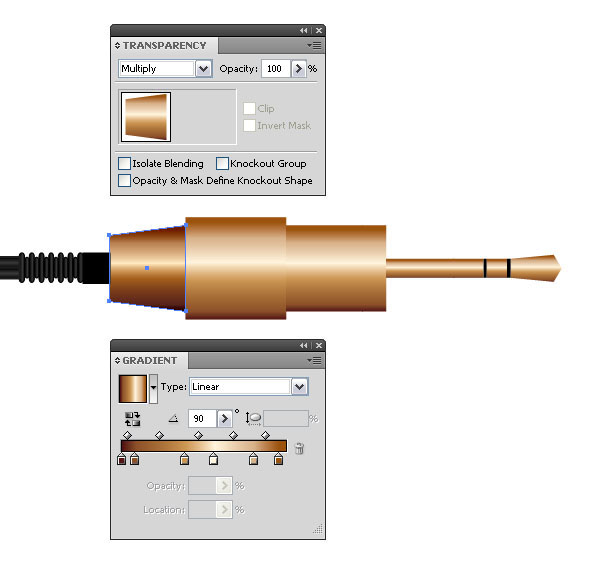
Select all the other shapes and fill them with the golden gradient, radius 90 degrees. Just keep the two small rectangles filled with black.
Step 26
Select each golden shape separately, duplicate it on top (Command + C + F) and set the Layer Mode to Multiply.
Step 27
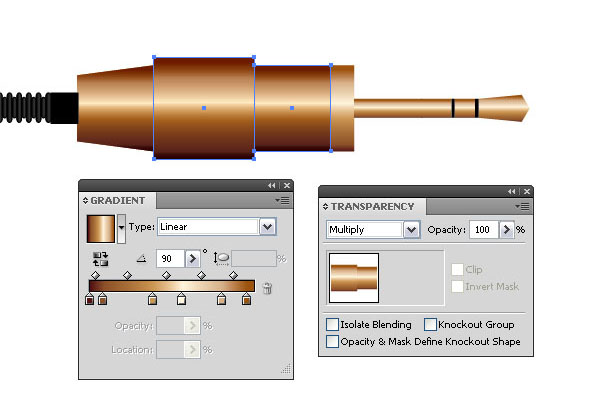
Select the next two shapes and repeat Step 26.
Step 28
Skip the next two shapes and select the following two rectangles. Repeat the duplicate and Layer Mode change.
Step 29
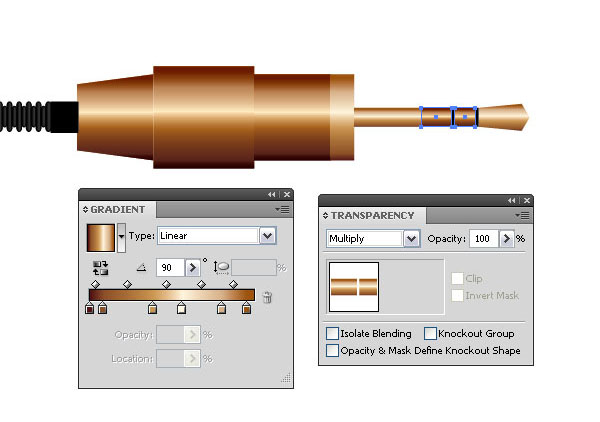
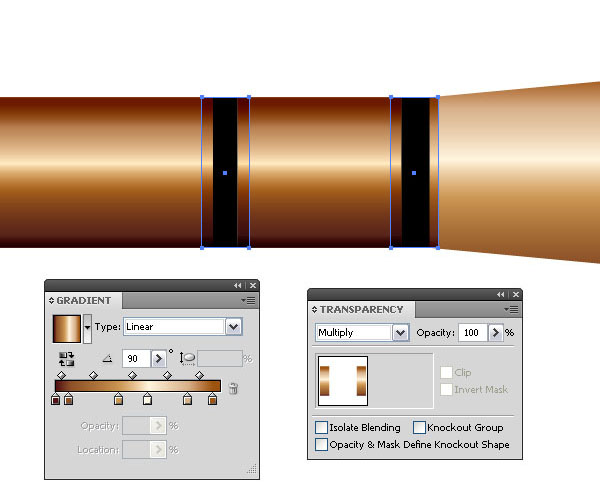
Select the two black shapes, duplicate them on top and increase the width with the Scale Tool (E), then fill them with the golden gradient and set the Layer Mode to Multiply.
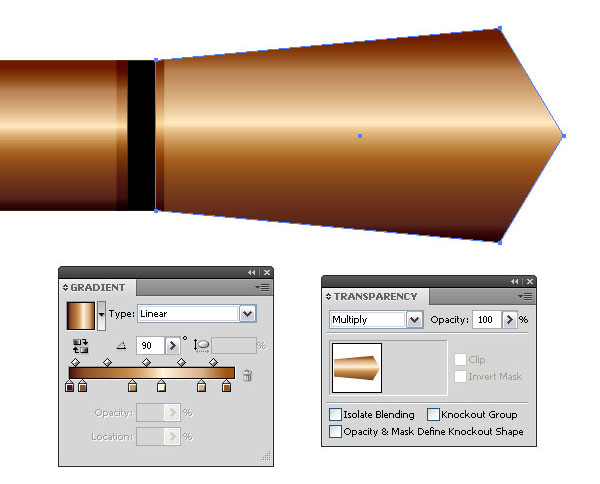
Step 30
Last but not least, duplicate the tip shape on top and change the Layer Mode to Multiply.
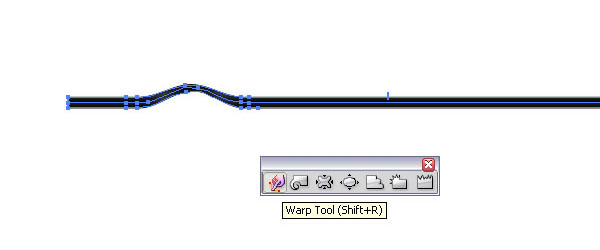
Step 31
Select the cable shapes and make a duplicate. Then select the Warp Tool (Shift + R) and start pushing the cable shapes.
Step 32
Keep it simple and apply slight warping.
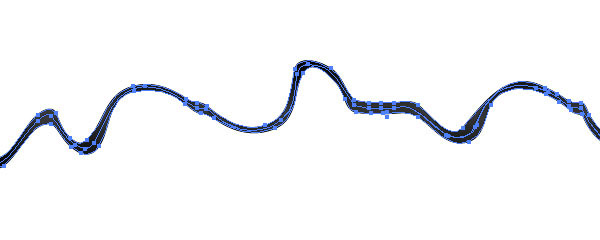
Step 33
This is what it could look like. Make sure you don’t warp to much so the shapes won’t separate.
Step 34
Connect the warped cables to the plug and voila, we have our little golden headphone plug. I applied small white squares which I duplicated and then grouped to simulate the rippled texture on a plug.
Conclusion
I grouped the shapes, reflected them and applied an Opacity Mask to simulate a reflective surface. You can easy change the colors or apply other gradients. Have fun!
Subscribe to the Vectortuts+ RSS Feed to stay up to date with the latest vector tutorials and articles.
How to Create a Vector Goldfish in Six Steps
How to Create a Vector Goldfish in Six Steps: "


 "
"
In this tutorial I’ll show you the process I use for creating a vector goldfish in six easy steps. The steps are a bit condensed so Intermediate Illustrator users will benefit greatly, though beginners will be able to get similar results, you’ll just need to experiment a bit more with these tools and techniques. The vector goldfish is created with the use of the Mesh, Blend and Symbol Tools. Let’s get started!
Final Image Preview
Want access to the full Vector Source files and downloadable copies of every tutorial, including this one? Join Vector Plus for just 9$ a month.
Tutorial Details
- Program: Adobe Illustrator CS3
- Difficulty: Intermediate
- Estimated Completion Time: 45 minutes
Below is the final image we will be working towards.
Step 1
Draw the goldfish and scan the drawing. Now open Adobe Illustrator and create a new document (Command + N) at 600 px by 600 px. Insert an image in the document by going to File > Place, then Lock the layer with the scanned image of the goldfish drawing.
Step 2
Make a new layer on top. Start by tracing the outline of the goldfish using the Pen Tool (P). For comfort of work we’ll place different elements in separate layers. Pay attention that the tail of the fish consists of two paths.
Step 3
In this step we’ll paint the body of fish using the Mesh Tool.
In order that to get a beautiful Mesh under the path of the fish, first create a rectangle (Rectangle Tool (M)) with an orange (C=0; M=87; Y=100; K=0) fill and without stroke. Select the rectangle and path of the fish, then make Clipping Mask (picture 3a).
Before we move farther, I urgently recommend you lock all layers you aren’t currently working with so that nothing gets inadvertently moved. In picture 3b all layers except for a rectangle are noted as locked. We’ll make this rectangle into a Mesh shortly.

picture 3a

picture 3b
Create the specks of light on the body of the fish. Add a point to the mesh by using the Mesh Tool (U) and clicking anywhere in the shape’s area (picture 3c). After converting a shape into a mesh, you can select points with three tools: Mesh Tool, Direct Selection Tool, and the Lasso Tool.
All you have to do now is to add color to the mesh by selecting a color from the swatches palette. I took colors from the Swatch library > Metal. Get creative with color in this stage to get an excellent result.

picture 3c
Step 4
Now we’ll create an eye, gill and mouth of the fish. The eye consists of five ellipses located one over another, below the biggest and further in each ellipse decreases in size. The ellipses are filled in by various kinds of gradient and solid colors as shown below. The mouth and gill is filled in by a linear gradient.
Step 5
Now we’ll work on the fins. Fill them in with a linear gradient and Opacity of 70% (picture 5a). Let’s place lines in the fins. Create a brush by first using the Ellipse Tool (L) to make a circle 3px by 3px in any color and without stroke. Drag the right anchor point to the right by means of the Direct Selection Tool (A), while holding Shift to constrain. Convert the selected anchor point to a corner (picture 5b). Transfer the created shape to the Brushes palette and select New Art Brush. Along the edges of a fin drawn two curves (Pen Tool (P) and apply to them the just created brush.
Select both curves and make a Blend, by going to Object > Blend > Blend Options Spacing: specified Steps set to 16, then Object > Blend > Make (Alt + Command + B) (picture 5c). Make Object > Blend > Expand and ungroup our curves. Now let’s correct the bottom ends of the fin edges (picture 5d). Correct this using the Direct Selection Tool (A), moving the bottom anchor points.
Now select all the curves and go to Object > Expand Appearance, Object > Path > Clean Up. Now fill it in with a linear gradient, Opacity set to 70% (picture 5e). Use a similar workflow to make our other fins.

picture 5a

picture 5b

picture 5c

picture 5d

picture 5e
Step 6
Now let’s create the scales. Make a new layer on top. Open our Symbols palette, in the library search for Artistic Textures and select Stipple large. Grab the Symbol Sprayer Tool (Shift + S), spray a texture (in our case we’ll be 5-6 clicks will be enough).
Take the tool Symbol Stainer Tool from the Symbol Sprayer Tool submenu, choose a color and paint a texture (picture 6a). Now use the excellent Symbol Screener Tool,select the texture, and very quietly in the corners we’ll click with this tool.
In the middle the texture has turned out non-transparent and along the edges it is hardly visible. Now change the blending mode of the texture we just put on the fish to Lighten and Opacity to 60% (picture 6b). Copy the texture, change blending mode to Color Dodge, set the Opacity to 100% and slightly rotate it (picture 6c).

picture 6a

picture 6b

picture 6c
Conclusion
The goldfish is ready! Have fun using these techniques to make a whole school of vector fish!
Subscribe to the Vectortuts+ RSS Feed to stay up to date with the latest vector tutorials and articles.
Subscribe to:
Posts (Atom)
